Solenoid Valves - Added Hydraulic Circuits
Since I purchased my PT1850, I have not been happy with having to switch the hydraulic lines between the quick disconnect and a hydraulic implement. I also did not like that I had to reach below to use the auxiliary lever to control these cylinders. Buying a used V-Plow finally forced me to address these issues. So, I purchased two solenoid selector valves from Surplus Center. The installation went in stages over a period of a couple of months just because of very limited free time. |
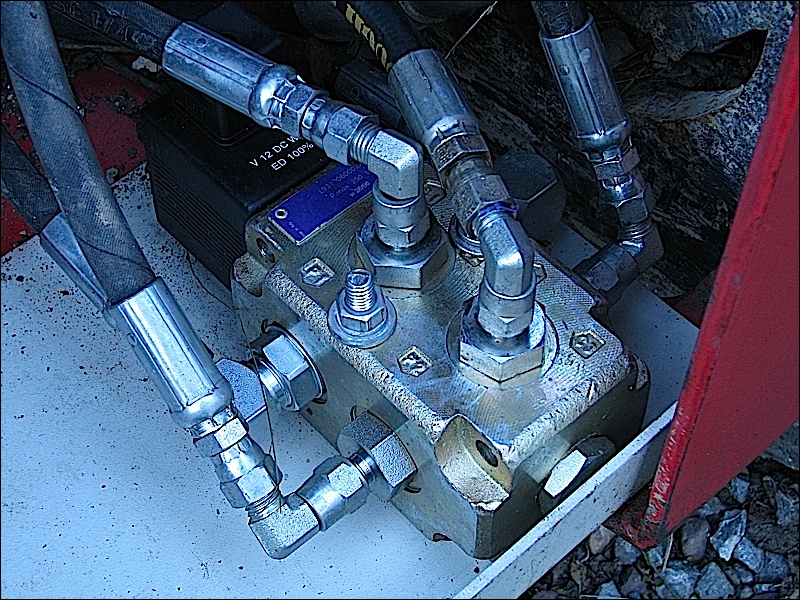
Here's a picture of one of the selector valves installed near the front wheel motor. I cut some scrap to span the opening at the front of the PT, making sure there was clearance for the tilt mechanism (Shown in the second picture which also shows the numerous hoses, many of which were already there):
The connections on the valve body are straight thread fittings. I used Loctite 545 on the threads, letting them cure for a couple of days before proceeding further. The inputs to the two new selector valves are the original lift and tilt circuits respectively. The unpowered outputs go to the existing lift and tilt cylinders. So with no power applied, my joystick acts as it always has. The powered outputs from one selector valve goes to the existing auxiliary PTO circuit. The other feeds a new second auxiliary PTO circuit. I plumbed the quick disconnect circuit directly to the cylinders and it still uses the original auxiliary PTO handle. For quite some time, I had known I was going to do this project and others requiring hydraulic lines so when the opportunity arose, I bought an inexpensive discontinued heavily used Gates hydraulic fitting crimper. The fittings for it are discontinued but I can use Discount Hydraulic Hose fittings by just setting to the right size crimp. The lines I used are 1/4" since these are controlling hydraulic cylinders and high flow is not desired. |
Here's some more pictures. First the new PTO connections:
You can see the new U-shaped bracket that I made that I attached using the existing bolt for the protective coupling plug. I used 3/8" threaded hydraulic pipe with mounting blocks to add my quick connect fittings.
|
|
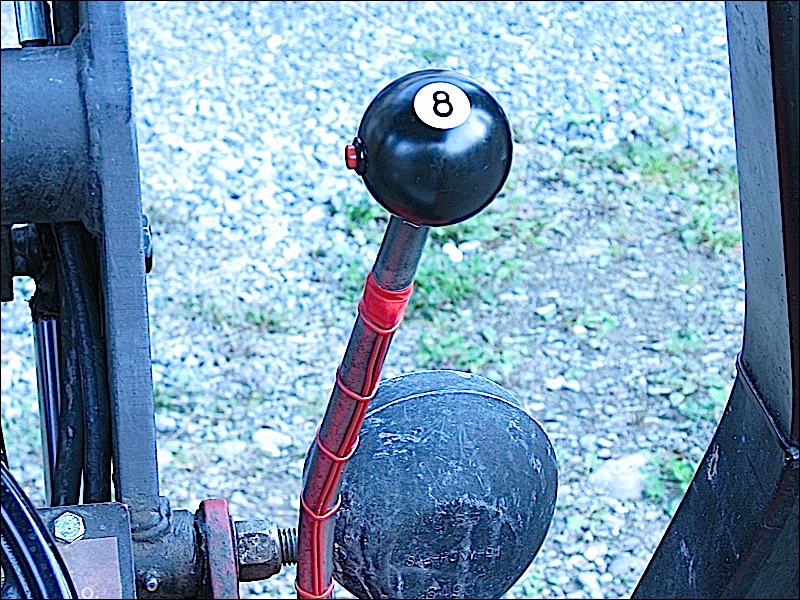
Obviously, the solenoids need to be controlled. I tapped power from a protected circuit that I had previously run to the console. The original joystick know was removed and I drilled out an 8-ball and tapped it so I could mount it to the joystick lever. I also drilled the side of the ball to accept a low profile switch. That would allow me to control the lift tilt circuits normally but when I pushed the side button, I would power the selector valves and control the two auxiliary PTO circuits. I drilled out the center of the lever down about 3 1/2 " and then drilled a side hole at the end of that. The wires run from the switch through the ball, down the lever a few inches and then out the side of the lever where they continue to the supply and selector valves. I am quite happy with how things turned out.
At some point, I will likely add a front plate to help protect the hydraulics although it has not seemed to be an issue so far.
|